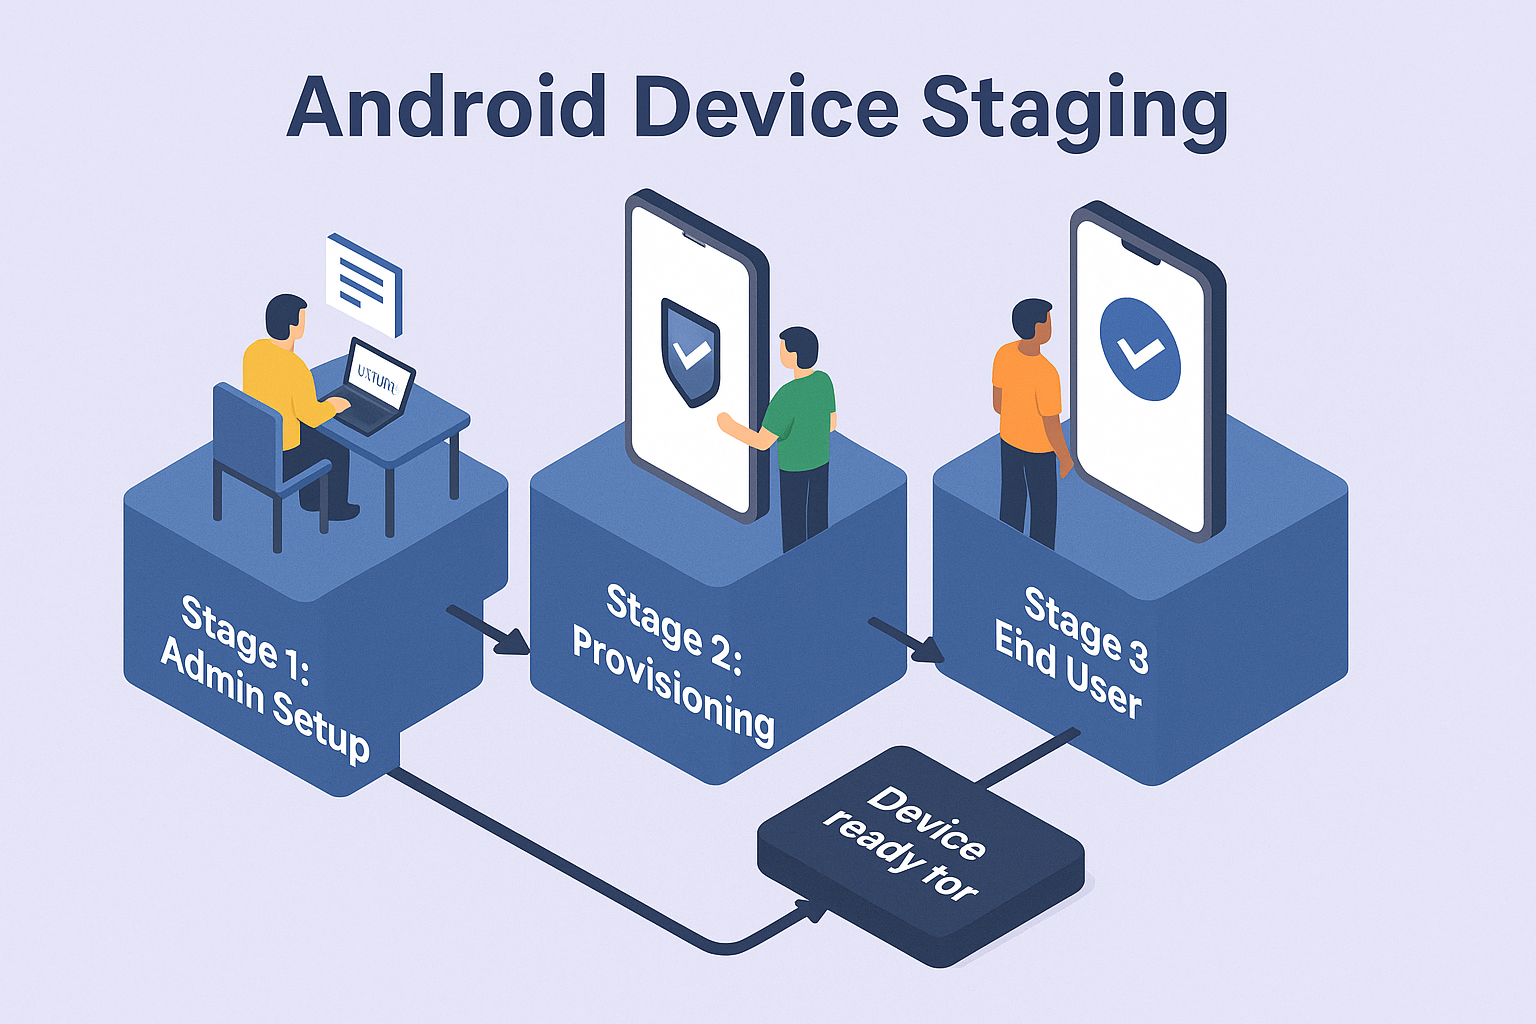
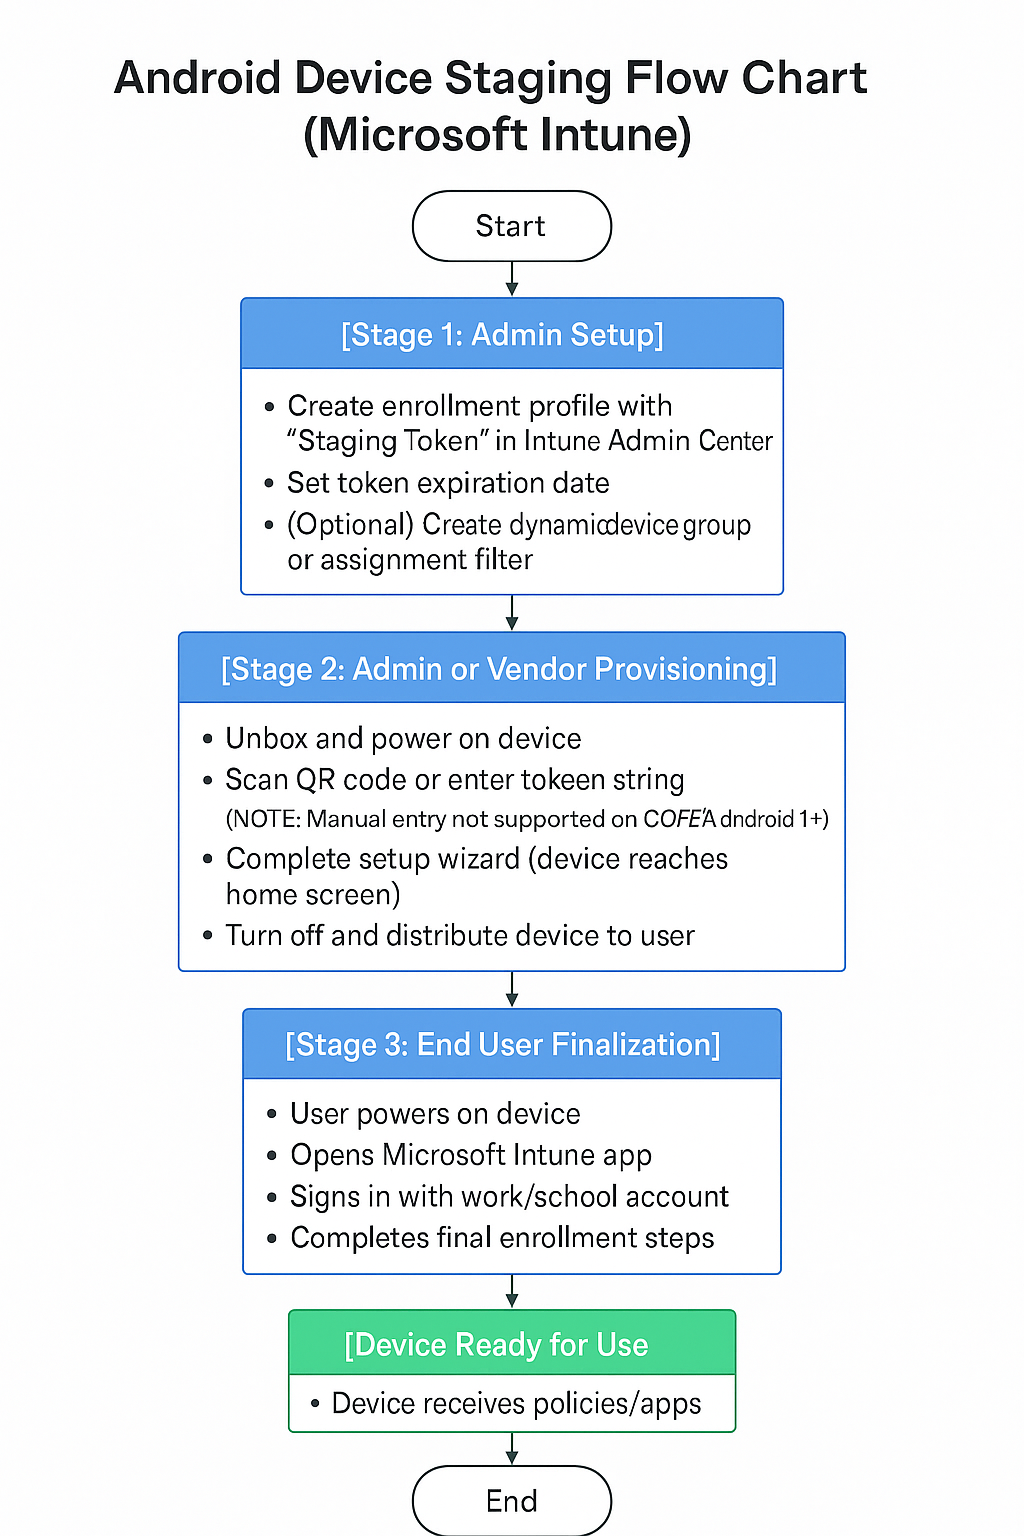
Android device staging, or autopilot, in Microsoft Intune allows organisations to pre-provision Android Enterprise devices before handing them to end-users. This process minimises the steps required for user setup and ensures that each device is compliant and configured from first use.
This article explores how Android staging works within Intune, its benefits, and step-by-step instructions for implementation. We’ll also compare Android staging with Windows Autopilot and include key visual references to help IT admins deploy efficiently.
Lifecycle Stages:
| Stage | Android Device Staging (Intune) |
|---|---|
| 1. Device Procurement | Purchase a device or bulk import into Intune |
| 2. Enrollment Preparation | Generate staging token; assign enrolment profile |
| 3. Device Provisioning | IT/vendor stages device with policies & apps |
| 5. Device Finalisation | End-user signs in on staged device |
| End-user signs in on the staged device | User receives configured device; minimal setup |
| 6. Management & Monitoring | Managed via Intune (Apps, Compliance, Configs) |
Key Concepts of Android Device Staging
Android staging allows IT admins or third-party vendors to complete initial device setup, including app deployment and policy application, before handing it to users. The only remaining step for the end-user is to power on the device and sign in.
Features of Android Device Staging:
- Reduced User Interaction: Users only need to sign in with their credentials.
- Pre-Provisioning: Devices are preloaded with apps, policies, and settings.
- Token-Based Enrolment: Utilises a staging token rather than the default type.
- Supported Profiles: Fully Managed and Work Profile devices are supported.
For official reference: Microsoft Docs – Android Enterprise enrolment
Step-by-Step Configuration Android Device Staging
Step 1: Configure devices group
- Go to the AD groups > All groups > New Group
- Give the group A Name,
Android_AutoPilot - set
Intune Provisioning Client or Intune ClientConfidentialas the group owner (Optional) - If you can’t find the above you can search using the principal ID f1346770-5b25-470b-88bd-d5744ab7952c
If for some reason the ID is not present at all, you will have to manually add it.
New-AzureADServicePrincipal -AppId f1346770-5b25-470b-88bd-d5744ab7952c
Step 2: Create Enrolment Profile for Android Device Staging
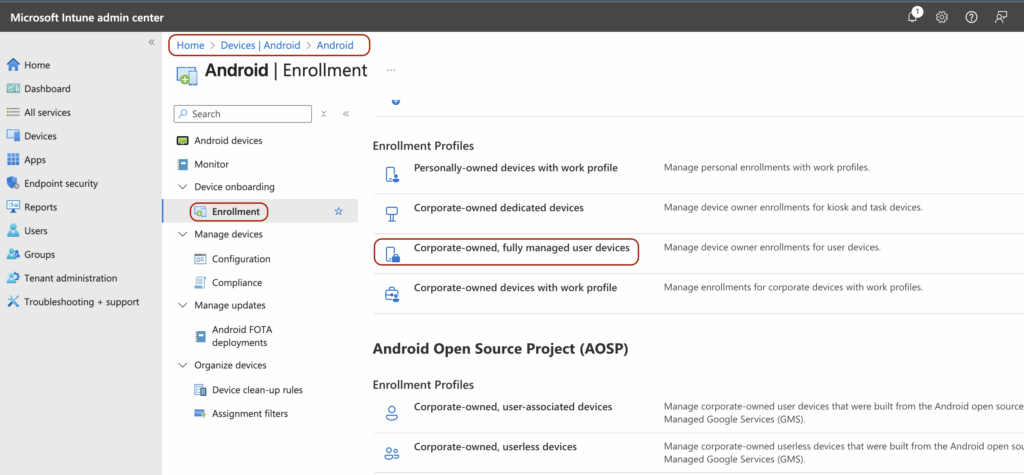
- Go to Microsoft Intune Admin Centre> Devices > Android > Enrollment profiles.
- Choose Corporate-owned, Fully Managed or Work Profile.
- Then choose Creat
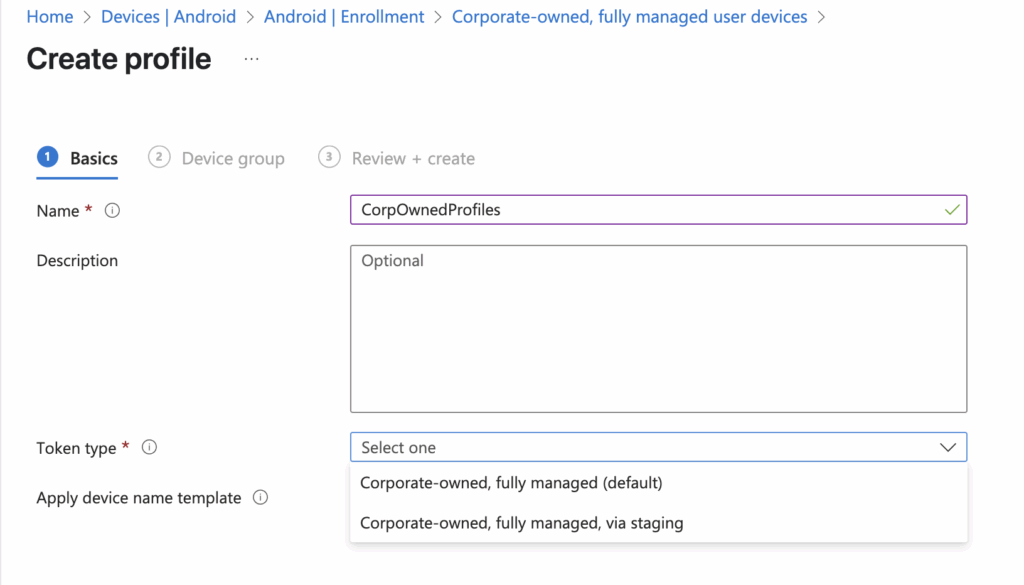
Step 3: Generate Staging Token
- In the same section, select the Token type
- Corporate-owned, fully managed (default) – Normal Setup
- Corporate-owned, fully managed, via staging (We are going to talk about it in this post)
- Select, Corporate-owned, fully managed, via staging
- You will need to configure the Token expiration date differently than with the Corporate-owned, fully managed (default) option
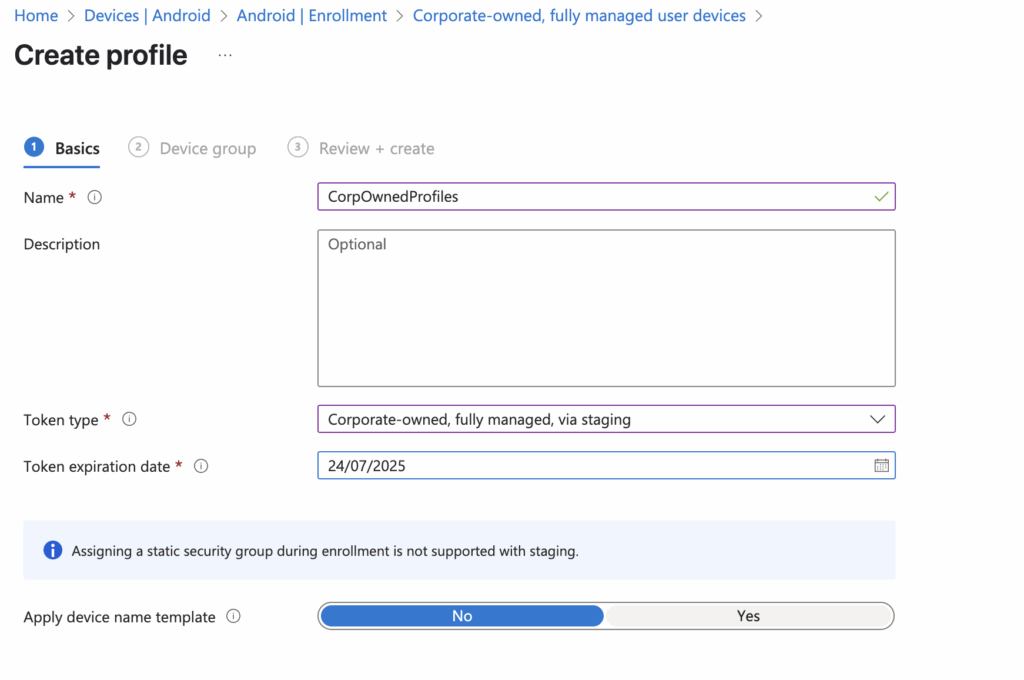
using format MM/DD/YYYY or YYYY-MM-DD. The selected date can be a maximum of 65 years from the date of profile creation and will be the last day that the token is valid for use. The token will expire on the selected date of expiration at 12:59:59pm in the time zone local to where the token was created.
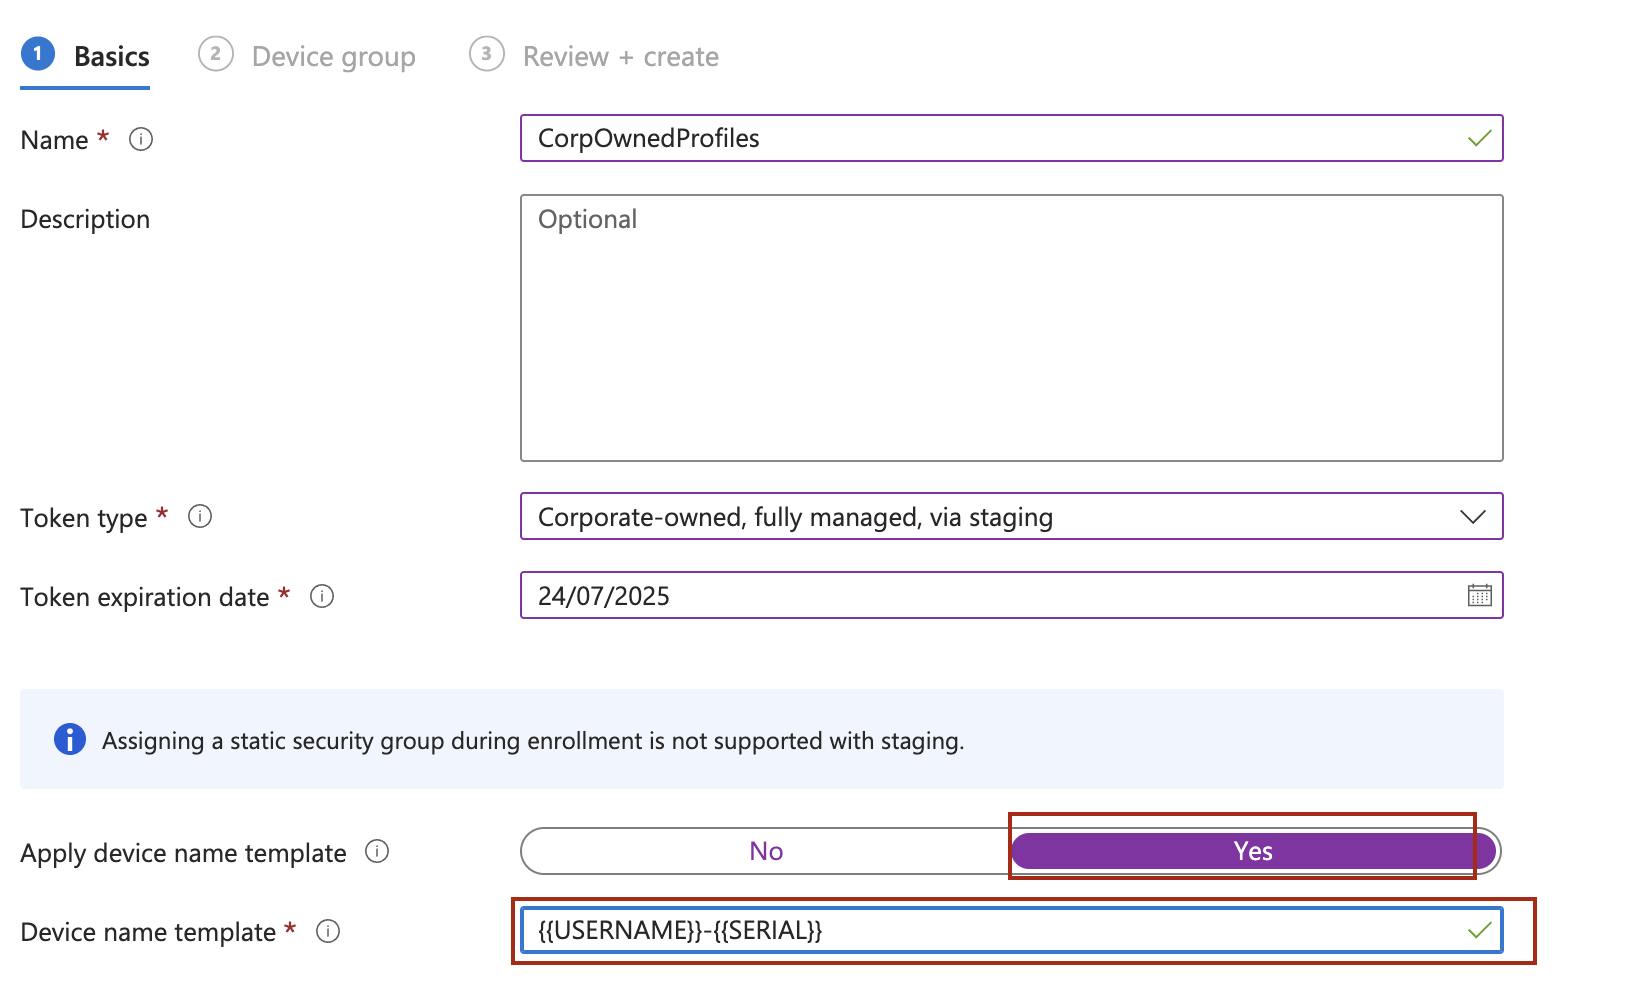
- Select Apply device name template; it is especially useful when managing many users and helps you maintain control over your assets.
- In this example, I used {{USERNAME}}-{{SERIAL}}, but you can customise the template with any combination you prefer.
| Placeholder | Description | Example |
|---|---|---|
{{SERIAL}} | Inserts the device’s full serial number. | ABCD123456789 |
{{SERIALLAST4DIGITS}} | Inserts the last 4 digits of the device’s serial number. | 6789 |
{{DEVICETYPE}} | Inserts the device type. | AndroidForWork |
{{ENROLLMENTDATETIME}} | Inserts the date and time the device was enrolled. | 2025-06-24T14:23Z |
{{UPNPREFIX}} | Inserts the user’s first name (if user-affiliated). | Eric |
{{USERNAME}} | Inserts the user’s username (if user-affiliated). | EricSolomon |
{{RAND:x}} | Adds a random number string with length x (1–9 digits). | 12345 (if x = 5) |
- Then click next
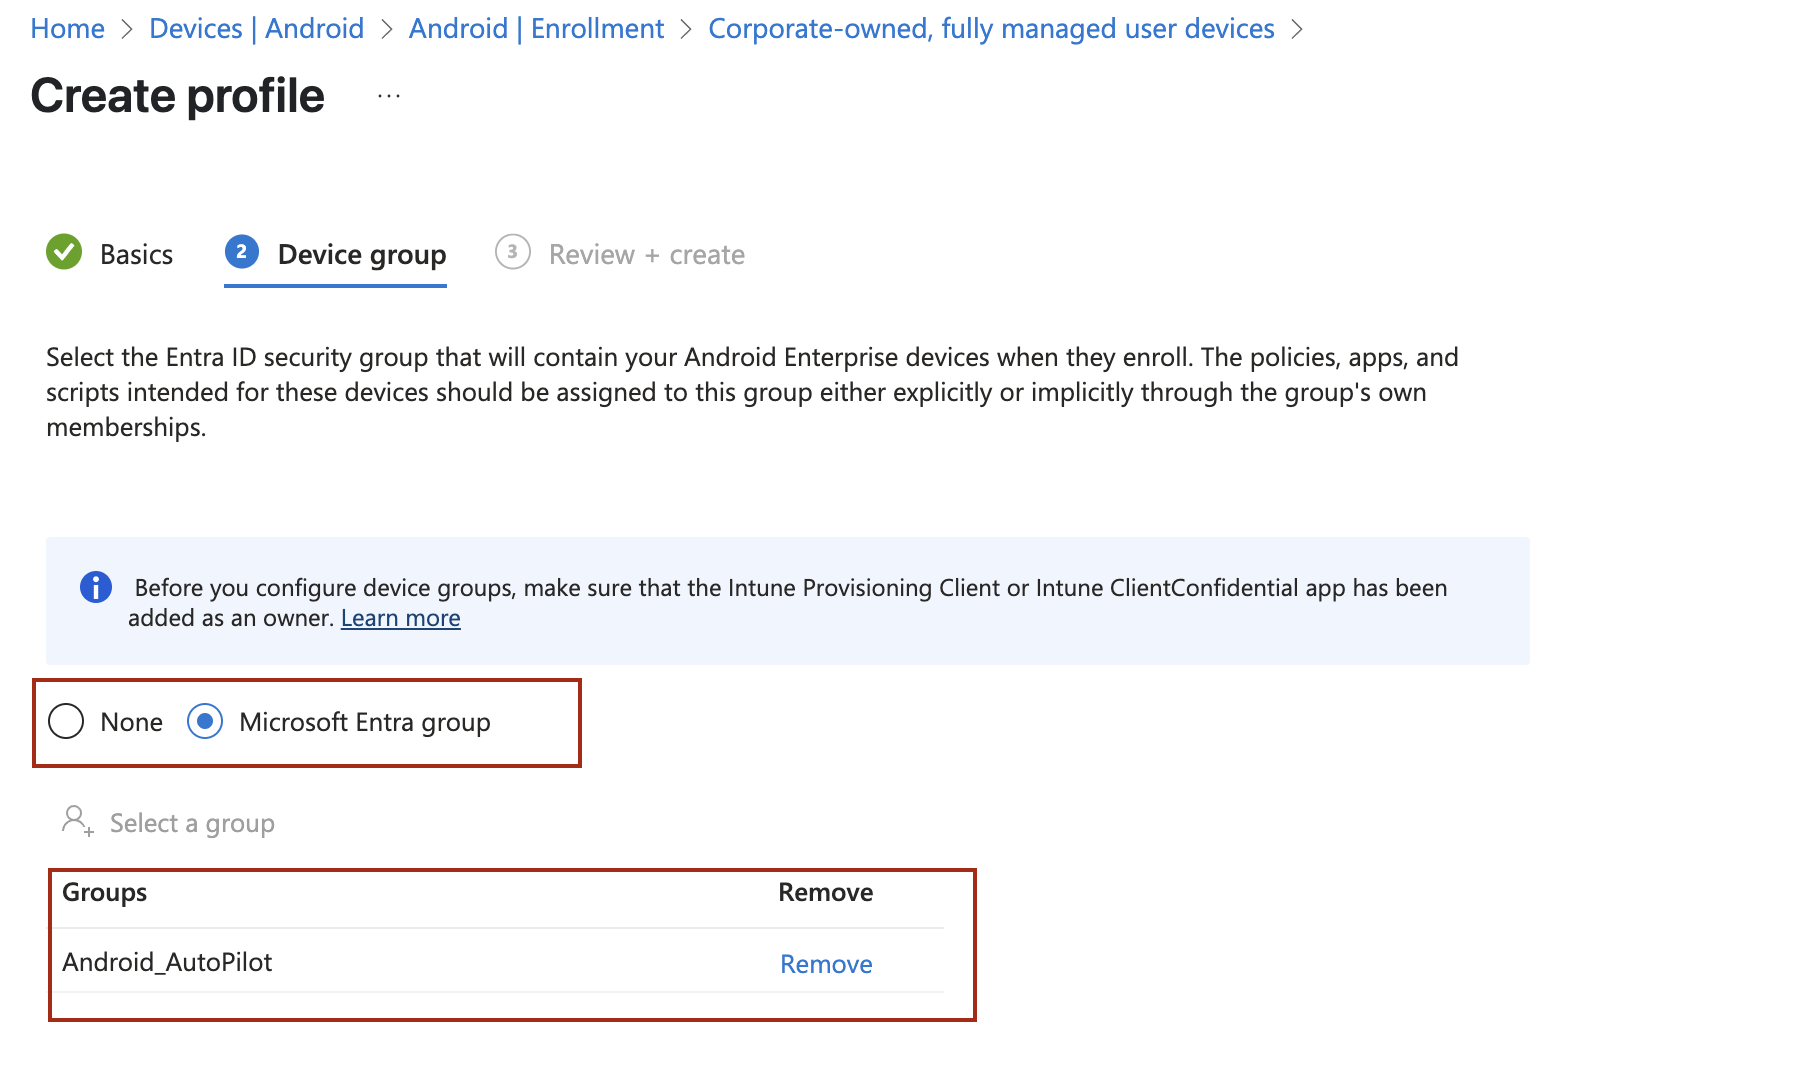
Step 4: Assign the Group created in Step 1
Depending on your step, you could assign the Entra group, or you can select None
Then click Create
Step 5: Distribute the Android Device to the Staging Team
- Devices are sent to the staging staff or vendor with the staging token.
- Devices will be enrolled on Intune and display with a name prefix such as “Staging_”.
Step 6: Assign Apps and Policies
- Use dynamic groups or direct assignments to apply:
- Required apps
- Compliance policies
- Configuration profiles
Step 7: User Handover
- The user powers on the device, connects to a network, and logs in.
- Their credentials finalise the setup process.
Benefits and Real-World Use Cases
Efficiency Gains:
- Devices are fully configured before handover, saving setup time.
Improved User Experience:
- Users enjoy a seamless and professional onboarding process.
Reduced Support Load:
- Minimal user setup steps mean fewer support tickets.
Ideal Scenarios:
- Onboarding field workers
- Provisioning large device fleets
- Preparing shared devices for departments
Conclusion
Android device staging with Microsoft Intune enables IT admins to deliver a smooth and scalable device onboarding experience for Android Enterprise environments. By pre-provisioning and automating policy delivery, organisations can reduce IT overhead and deliver a best-in-class user experience.